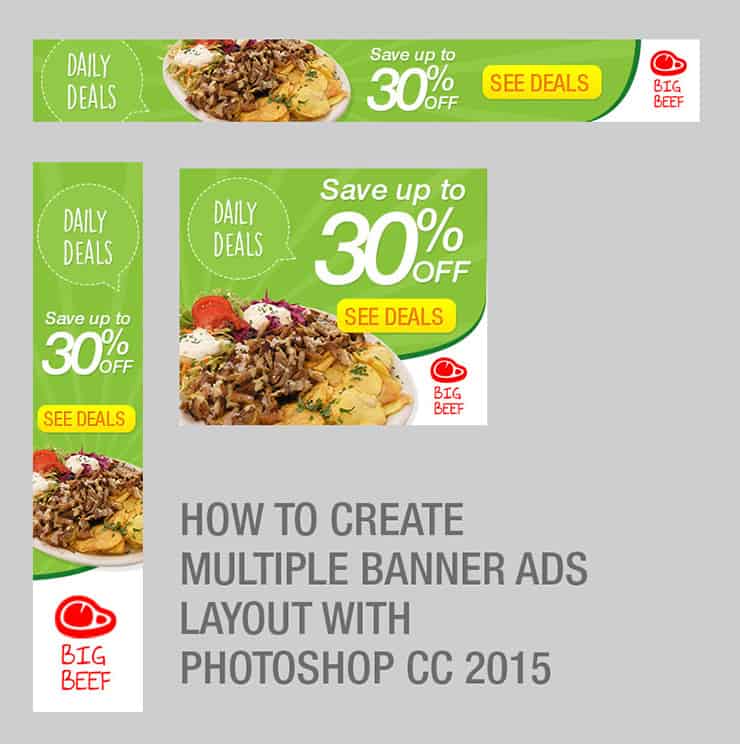
To create a banner ad in Photoshop, start by setting the correct dimensions and resolution. Then, add your text, images, and branding elements.
Creating a banner ad in Photoshop is a straightforward process that allows for a high level of customization. First, determine the size and resolution required for your banner ad, ensuring it meets the specifications for the platform where it will be displayed.
Next, focus on the design elements, such as adding compelling text, high-quality images, and your brand’s logo. Use layers to manage different elements and effects. Make sure the design is visually appealing and aligns with your brand’s identity. Finally, save the banner ad in the appropriate format, commonly PNG or JPEG, for optimal web use.
Setting The Stage For Banner Design
Banner ads come in various sizes. Common dimensions include 300×250 pixels and 728×90 pixels. Smaller sizes like 160×600 pixels are also popular. Choose a size that fits your design goals. It’s important to check the requirements of the platform where the ad will be displayed.
JPEG and PNG are commonly used for banner ads. JPEG is best for photos and detailed images. PNG works well for graphics and text. GIF format can be used for animated banners. Choose the format that maintains quality while keeping the file size small. This ensures quick loading times on websites.
Navigating The Photoshop Workspace
Open Photoshop and locate the toolbar on the left. This toolbar has many tools for different tasks. The options bar at the top shows settings for the selected tool. On the right, the panels like Layers and Colors help you manage your work. Use the Move Tool to drag items around. The Brush Tool lets you paint on the canvas. Get comfortable with these tools for easy editing.
Go to File > New to create a new document. Set the width and height for your banner ad. A common size is 728×90 pixels. Choose RGB Color mode for web graphics. Set the resolution to 72 pixels per inch. Click Create to open your new canvas. Now you are ready to design your banner ad. Use the Rectangle Tool to create shapes. Add text using the Text Tool.
Laying The Foundation
Open Photoshop and create a new document. Choose the banner size. Common sizes are 728×90 or 300×250. Select the background color. Use a bright color to grab attention. A gradient can add depth. Go to the Gradient Tool and choose your colors. Drag the tool across the canvas. This creates a nice effect.
Layers help you manage different parts of the design. Start by creating a new layer for each element. Text, images, and shapes should all be on separate layers. Name your layers for easy access. Use Layer Styles to add effects. Drop shadows and strokes can make elements pop. Group layers to keep them organized.

Credit: www.shutterstock.com
Incorporating Text And Graphics
Choose a font that stands out. Fonts should be easy to read. Avoid overly decorative fonts. Bold and italic styles can add emphasis. Contrast between text and background is key. Experiment with different sizes. Ensure text is legible from a distance. Consistency in typography creates a cohesive look.
Import images into Photoshop. Use high-resolution images. Resize images without losing quality. Crop images to remove unwanted parts. Adjust brightness and contrast. Add filters for a unique look. Layer images for depth. Save your work frequently.
Applying Effects And Enhancements
Filters can make your banner ad more eye-catching. Open your image in Photoshop. Go to the Filters menu at the top. Choose a filter that fits your design. Experiment with different options. Try the Blur filter for a soft look. Use the Sharpen filter for a crisp image. Play around with settings. Find the best look for your ad.
Colors and contrast are important. They can make your ad stand out. Click on the Image menu. Select Adjustments. Choose Hue/Saturation to change colors. Move the sliders to see changes. Select Brightness/Contrast for better contrast. Adjust the sliders slowly. Watch how your image changes. Save your work often.

Credit: www.youtube.com
Finalizing And Exporting Your Banner
Check how your banner looks in different sizes. Make sure all elements are clear. Test the banner on various devices. Ensure it loads quickly. Fix any errors you find.
Go to the ‘File’ menu. Select ‘Save for Web and Devices’. Choose the right format, like JPEG or PNG. Adjust the quality settings. Make sure the file size is not too big. Click ‘Save’ and choose the location on your computer.

Credit: www.photoshoptutorials.ws
Frequently Asked Questions
How Do I Create A Banner For Advertising?
To create a banner for advertising, use graphic design tools like Canva or Adobe Spark. Choose eye-catching colors, clear fonts, and a strong call to action. Ensure the banner is mobile-friendly and optimized for quick loading. Test different designs to see what works best.
How To Create Advertisement And Wallpaper Using Photoshop?
Open Photoshop and create a new document. Use the toolbar to add images, text, and effects. Save your work.
How To Make A Banner In Photoshop For Printing?
Open Photoshop and create a new document. Set dimensions, resolution, and color mode. Design your banner using layers. Save as PDF or TIFF for printing.
How To Create A Header In Photoshop?
Open Photoshop and create a new document. Use the Text tool to add your header text. Customize fonts and colors. Adjust size and position using the Move tool. Save your design.
What Is The Ideal Banner Ad Size?
The ideal size for a banner ad is 728×90 pixels, also known as a leaderboard.
Conclusion
Creating a banner ad in Photoshop is simple with the right steps. Follow this guide for professional results. Practice regularly to improve your skills. Your ads will soon captivate your audience. Remember, creativity and precision are key. Start designing your next banner ad today and watch your engagement grow.
